Resurrection Cookie Time! :D
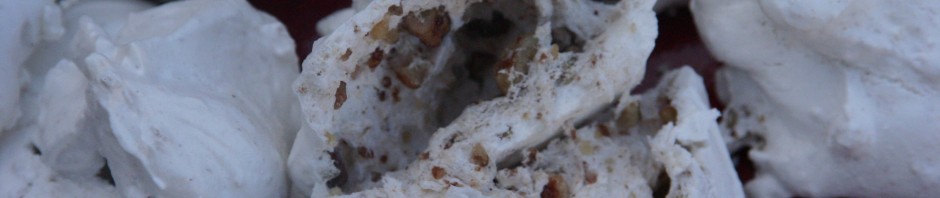
It's that time again! Time to not only celebrate the resurrection of my Lord & Savior Jesus Christ, but time to commemorate and celebrate with food! My kitchen has always been a hubbub of activity ever since my kids were little. My "babies", who are now now teens & young adults, enjoyed participating in the process of making resurrection cookies. It was a great way for them to learn the true meaning of Easter.......what kid doesn't like hands-on activities? Albeit, they are NOT healthy at all, but this is a recipe meant for once a year and the concept becomes really concrete for the kids as they "crush" the pecans and taste the sour vinegar. The best part is Easter morning when they break open the cookies and, much to their surprise, the cookies are hollow! This symbolizes the empty tomb - Jesus is no longer dead! HE IS RISEN! HE IS RISEN INDEED!!!!!
Below is the recipe. Gather all your ingredients, enjoy your little ones and have fun making memories!! :)
Resurrection Cookie Ingredients:
- 1 c whole pecans
- 1 tsp vinegar
- 3 egg whites
- Pinch of salt
- 1 cups sugar
- 2 zipper bags
- Wooden spoon
- Tape
- Bible
STEP 1: Preheat oven to 300.
STEP 2: Place pecans in a zipper bag (you might want to “double bag” to make sure you don’t have a big mess) and let kids beat them with the wooden spoon to break into small pieces. Explain that after Jesus was arrested, the Roman soldiers beat him. (Read John 19:1-3)
STEP 3: Let the kids smell the vinegar and even taste it. Add the vinegar it into a mixing bowl. Explain that when Jesus was thirsty on the cross, He was given vinegar to drink. (Read John 19:28-30)
STEP 4: Add egg whites to vinegar. Eggs represent life. Explain that Jesus gave His life to give us life. (Read John 10:10-11)
STEP 5: Sprinkle a little salt into each child’s hand. Let them taste it and brush the rest into the bowl. Explain that this represents the salty tears shed by Jesus’ followers. (Read Luke 23:27)
STEP 6: Add sugar. Explain that the sweetest part of the story is that Jesus died because He loves us. He wants us to know Him. (Read Psalm 34:8 and John 3:16)
STEP 7: Using an electric mixer, beat egg white mixture on high speed until stiff peaks are formed (12-15 minutes). Explain that the color white represents the purity and cleaning of our sins because of what Jesus did for us. (Read Isaiah 1:18 and John 3:1-3)
STEP 8: Fold in broken nut or mini-chocolate chips and drop by teaspoonfuls onto a cookie sheet covered with wax paper. Explain that each mound represents the rocky tomb where Jesus’ body was laid. (Read Matthew 27:57-60)
STEP 9: Put the cookie sheet in the oven, close the door and turn the oven off. (The cookies will bake in the pre-heated oven overnight if you DO NOT OPEN THE OVEN DOOR). Give each child a piece of tape and seal the oven door. Explain that Jesus’ tomb was sealed. (Read Matthew 27:65-66)
STEP 10: Go to bed and explain that they may feel sad to leave the cookies in the oven overnight. Jesus’ followers felt despair when the tomb was sealed too. (Read John 16:20-22)
STEP 11: On Easter morning, open the oven and give everyone a cookie. Notice the cracked surface and take a bite. The cookies are hollow! On the first Easter, Jesus’ followers were amazed to find the tomb open and empty. Celebrate that Jesus is risen! He is risen indeed! (Read Matthew 28:1-9)
Comments
Post a Comment